How to create a PDF booklet for printing (free double-sided imposition)
Quick summary
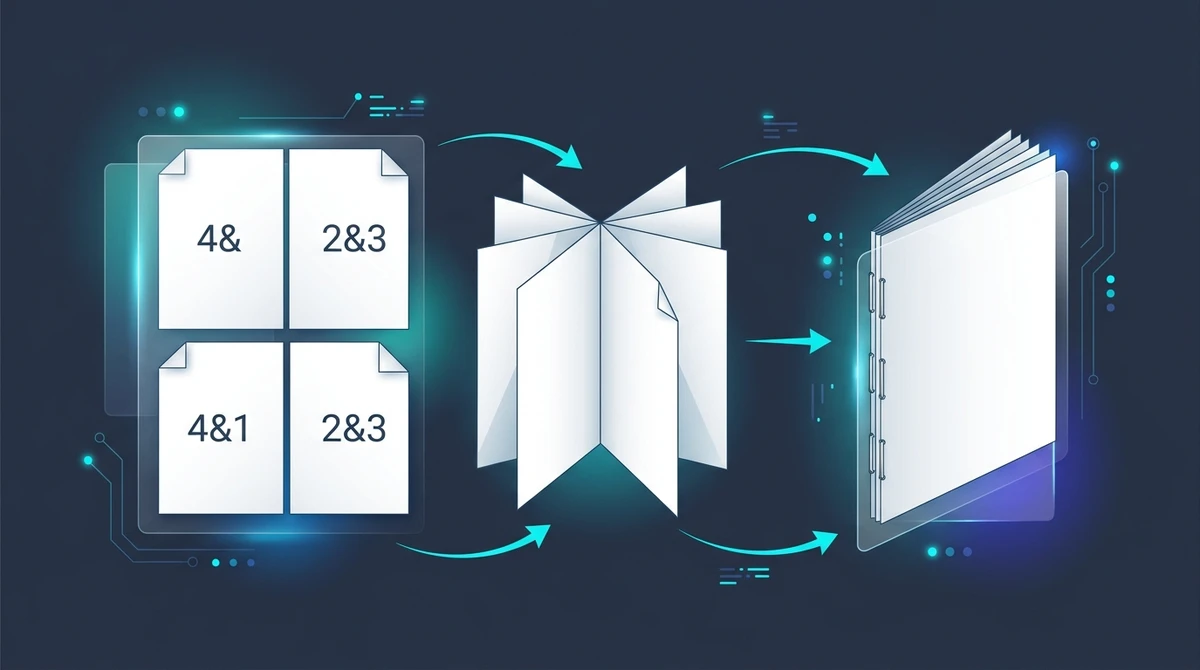
A PDF booklet maker is a document engineering tool that rearranges sequential PDF pages into signature imposition spreads. This allows standard two-sided printers to produce foldable booklets where pages appear in exact numerical order after folding along the center spine and saddle-stitch stapling.
- 100 percent free: Turn any multi-page PDF into a foldable booklet online without subscriptions, software downloads, or watermarks.
- Mathematical signature imposition: Automatically pairs complementary pages side-by-side on landscape sheets so that folded pages read sequentially.
- Crucial duplex setting: Always configure your printer duplex mode to 'Flip on short edge' to prevent back pages from printing upside down.
- Automatic 4-page balancing: Saddle-stitched booklets require total page counts in multiples of 4, with blank pages added seamlessly when necessary.
Why printing a booklet requires signature imposition (and why normal printing fails)
Whether you are publishing a product manual, an event program, a church bulletin, a community zine, or a training workbook, turning a digital document into a folded physical booklet is one of the most rewarding document projects. A folded, saddle-stitched booklet feels substantial, looks professional, and saves half the paper of a standard binder stack.
However, almost everyone who attempts to print a booklet for the first time makes the exact same frustrating mistake. You take a 16-page PDF, open your desktop print dialog, enable double-sided printing, and send it to your office laser printer. The printer delivers eight two-sided sheets. You fold the stack neatly down the middle, staple the spine, and open the cover, only to discover total chaos: page 2 is facing page 15, page 3 is backed by page 14, and the content jumps around unpredictably.
This failure happens because standard desktop printing is purely sequential. The printer puts page 1 on the front of sheet 1 and page 2 on the back. But when you fold a stack of nested sheets in half, the pages on any single sheet do not follow sequential numerical order. Instead, the first page of your document must share a physical sheet with the very last page.
In the professional printing and prepress industry, solving this puzzle is called signature imposition. Imposition is the mathematical process of rearranging pages on carrier sheets before printing. When the sheets are printed two-sided, stacked in the correct order, and folded down the center spine, every page magically lands in consecutive numerical reading sequence.
For decades, signature imposition required expensive prepress software like Adobe Acrobat Pro or Adobe InDesign, which carry steep subscription fees. With AZ2PDF free online PDF tools, you can generate flawless, print-ready booklet impositions directly inside your web browser in seconds, completely free of charge.
Prepare professional folded brochures, event schedules, and catalogs with the AZ2PDF Booklet Creator tool. It performs saddle-stitch imposition, arranging pages so they fold in exact chronological order after double-sided printing.
The mathematics of booklet imposition: Page pairing and sheet sequence
Understanding how booklet imposition works eliminates the mystery and helps you plan your document layouts with total confidence. The entire process is governed by elegant mathematical principles.
1. The 4-page signature rule
A single flat sheet of paper has two sides: a front and a back. When you fold that sheet down the middle, you create two leaves and four separate reading surfaces:
- Surface 1: Front side, left half (becomes a back page or inside page).
- Surface 2: Front side, right half (becomes a front page or cover).
- Surface 3: Back side, left half.
- Surface 4: Back side, right half.
Because each physical folded sheet contains exactly four page positions, the total page count of any saddle-stitched booklet must be a multiple of 4 (such as 4, 8, 12, 16, 20, 24, 28, or 32 pages). If your original document has 10 pages, you cannot fold it into a booklet without adding two blank pages to reach 12. AZ2PDF handles this automatically by calculating total required sheets and padding the end of your document with clean, blank pages.
2. The complementary pairing formula
How does the imposition engine decide which pages go together? Consider an 8-page booklet. It requires exactly two physical sheets of paper ($8 / 4 = 2$ sheets):
- Sheet 1 (Outer cover sheet): The outside face pairs Page 8 (back cover) on the left with Page 1 (front cover) on the right. The inside face pairs Page 2 on the left with Page 7 on the right.
- Sheet 2 (Inner spread sheet): The outside face pairs Page 6 on the left with Page 3 on the right. The inside face (the centerfold) pairs Page 4 on the left with Page 5 on the right.
Notice the mathematical pattern: on every two-page spread, the sum of the page numbers always equals the total page count plus one ($T + 1$). In an 8-page booklet, every spread adds up to 9 ($8 + 1 = 9$, $2 + 7 = 9$, $6 + 3 = 9$, $4 + 5 = 9$). In a 16-page booklet, every spread adds up to 17 ($16 + 1$, $2 + 15$, $14 + 3$, $4 + 13$, and so on down to the centerfold of $8 + 9$).
3. The physical reality of paper creep (shingling)
When you fold a single sheet of paper in half, the fold is paper-thin. But when you nest six or eight sheets inside one another to create a 24-page or 32-page booklet, the collective thickness of the paper along the spine creates a physical displacement known as creep (or shingling). The innermost sheets are pushed outward beyond the edge of the outer cover sheet.
When the assembled booklet is closed and trimmed flat along the open face, the outer margins of the innermost pages end up narrower than those of the outside pages. For small booklets under 24 pages printed on standard 80 gsm copy paper, creep is negligible (less than one millimeter). For thicker booklets, keeping a comfortable inner gutter margin (at least 12 to 15 mm) ensures your body text never crowds the spine or gets clipped during trimming.
How to create a printable PDF booklet online in 3 simple steps
Transforming your multi-page document into a print-ready imposed booklet takes less than thirty seconds no credit card, and zero user account sign-ups. Follow these three straightforward steps:
Step 1: Upload your sequential PDF document
Open the free Booklet Maker tool in your web browser on Mac, Windows, Linux, iOS, or Android. Drag and drop your PDF into the upload zone, or click the browse button to select a file from your device storage. Your document loads into memory instantly without waiting in server queues.
Step 2: Automatic imposition calculation and signature balancing
The imposition engine inspects the total page count of your document, determines the necessary number of carrier sheets, and calculates the exact mathematical page sequence. If your page count is not divisible by 4, the engine automatically balances the signatures with clean blank filler pages at the back. Vector fonts, logos, and high-resolution images are scaled and positioned with 100 percent geometric fidelity.
Step 3: Download your print-ready booklet PDF
Click the Process button. In just a few seconds, the engine generates your imposed PDF, where each page in the output file represents a full two-page printing spread. Click Download to save the file directly to your device, completely free of watermarks, page limits, or quality degradation.
The golden printing rule: Duplex flip on short edge explained
Once you have downloaded your imposed PDF, the final hurdle is sending it to your printer. This is where many users run into the dreaded upside-down back page problem. Understanding the geometry of two-sided printing guarantees a perfect printout on your very first try.
Why normal printing uses flip on long edge
When you print normal portrait documents (such as a legal agreement or business letter), the paper is oriented vertically. To read page 2, you flip the paper from right to left like turning a page in a standard book. The axis of rotation is the long vertical edge. That is why printer drivers default to Flip on long edge (Long-Edge Binding).
Why booklet printing requires flip on short edge
An imposed booklet file is different. It places two portrait pages side-by-side onto a landscape sheet. Even though the individual document pages are portrait, the physical carrier sheet being fed into the printer is horizontal.
When you fold this sheet down the middle, the spine crease runs vertically down the center, dividing the sheet's width. But relative to the horizontal landscape sheet, that fold corresponds to the short dimension. If you leave your printer set to "Flip on long edge", the printer flips the paper along its wide horizontal axis, ca you must open your printer settings dialog and set the duplex option to Flip on short edge (also called Short-Edge Binding or Calendar style). This instructs the printer hardware to flip the sheet along its short side, ensuring that both front and back pages share the exact same upright orientation.
Printing on a manual (non-duplex) printer
If your office or home printer does not have an automatic two-sided duplex unit, you can still print booklets easily using manual duplexing:
- Open the print dialog and choose to print Odd pages only.
- Take the printed stack of odd sheets from the output tray.
- Place the stack back into the paper input tray without rotating the sheets upside down (maintaining the same top edge orientation).
- Open the print dialog and choose to print Even pages only.
- Your two-sided booklet sheets will emerge perfectly paired and ready to fold.
For reference materials that do not require center folding, you can alternatively format multi-page handouts on standard paper to condense study slides into economical review sheets.
Paper dimensions and geometry: ISO A4 to A5 versus US Letter to Statement
Choosing the right paper size is essential for a clean, professional finish. The physical size of your final booklet depends on the dimensions of the carrier sheet you put into your printer.
1. The international ISO 216 standard (A4 folded to A5)
In Europe, Asia, Latin America, and Oceania, the ISO 216 paper standard makes booklet production effortless. The ISO system is built on an aspect ratio of 1 to the square root of 2 ($1:1.4142$). This means that when you fold an A4 sheet (210 by 297 mm) in half across its width, you get two A5 pages (148 by 210 mm) with the exact same aspect ratio as the original sheet.
Because the proportions never change, an A4 PDF scales down to an A5 booklet with zero distortion, zero letterboxing, and balanced margins. This is the global gold standard for event programs, poetry collections, conference agendas, and user manuals.
2. North American imperial sizes (US Letter folded to Half-Letter / Statement)
In the United States and Canada, standard office printers use US Letter paper (8.5 by 11.0 inches). Folding a US Letter sheet in half produces two Half-Letter pages (5.5 by 8.5 inches, commonly called Statement size).
Unlike ISO paper, US Letter and Half-Letter have slightly different aspect ratios ($11 / 8.5 \approx 1.294$, whereas $8.5 / 5.5 \approx 1.545$). When imposing a full-size Letter document into a Half-Letter booklet, AZ2PDF maintains proportional scaling and automatically balances the outer margins and spine gutters so your typography remains clear and uncompressed.
If your source PDF contains mixed paper sizes, you can standardize all pages to a uniform format beforehand assembling the booklet is simple:
- Creasing the spine: Fold the entire stack in half together, or fold sheets individually for a sharper crease. Running a smooth plastic ruler or bone folder along the spine crease creates a crisp, professional edge that lays flat.
- Saddle-stitch stapling: A standard desk stapler cannot reach the center fold of an A4 or Letter sheet. You can use a long-reach stapler (widely available for under twenty dollars), or open a standard stapler flat, place an eraser or foam block underneath the center fold, press the staple through, and bend the staple legs inward manually. Two staples placed along the spine crease provide durable, clean binding.
For reference materials that do not require center folding, you can alternatively format multi-page handouts on standard paper to condense study slides into economical review sheets.
Booklet imposition versus N-Up layout versus merge: Choosing the right workflow
Because document engineering tools share related concepts like placing multiple pages on a single sheet, users often wonder which tool fits their specific task. Here is a clear guide to help you choose the right AZ2PDF tool:
1. Booklet imposition (AZ2PDF Booklet Maker)
What it does: Rearranges pages non-sequentially into mathematical folding signatures (such as pairing page 16 with page 1) for double-sided printing and center folding.
Best for: Folded brochures, booklets, church bulletins, theater programs, product handbooks, and zines. Use AZ2PDF Booklet Maker for all folded publication projects.
2. N-Up multi-page layout (AZ2PDF N-Up Layout)
What it does: Places consecutive pages sequentially in a grid on a flat sheet (page 1 and page 2 on sheet 1, page 3 and page 4 on sheet 2) without signature reordering.
Best for: Meeting handouts, lecture slide packets, study revision sheets, and multi-page proofing grids that will be read as flat sheets or stapled in the corner. For flat multi-page grids, use the free AZ2PDF N-Up Multi-Page Layout tool.
3. PDF merge (AZ2PDF Merge PDF)
What it does: Combines multiple independent PDF files into a single continuous sequential document.
Best for: Combining a separate cover design, table of contents, and interior chapters into one unified file before running it through the Booklet Maker. To assemble your source files first, use the free AZ2PDF Merge PDF tool.
4. Page rotation and removal utilities
Many older web conversion sites monetize visitor traffic by saving uploaded documents to permanent hard drive storage, harvesting metadata for marketing profiles, or leaving files vulnerable on unsecured public cloud servers. For privacy-conscious authors, educators, and enterprise teams, that approach creates serious confidentiality risks.
AZ2PDF operates under a strict, privacy-by-design architecture:
- Ephemeral in-memory streams: When you upload a document to our Booklet Maker, the file streams directly into isolated volatile server RAM. Your document is never written to permanent disk storage, relational databases, or public storage buckets.
- Automated five-minute purge daemon: An automated background cleanup daemon continuously monitors active memory allocations, permanently purging all processing traces within five minutes of completion.
- Zero AI training and zero indexing: Your documents are never scanned, cataloged, shared with third parties, or used to train artificial intelligence models. Your intellectual property remains strictly yours.
- 100 percent free with no hidden paywalls: All tools on AZ2PDF are completely free to use. There are no surprise subscription fees, trial limits, watermarks, or forced account registrations.
Master prepress folding and bindery workflows with the AZ2PDF prepress and booklet printing tools, which executes complex page imposition algorithms locally without server latency.
Quick fixes for common PDF booklet printing and binding issues
If you encounter unexpected results when printing or assembling your booklet, these straightforward solutions resolve the most common challenges:
1. Backside pages print upside down
This is the most common booklet printing problem. It occurs when your printer driver is set to "Flip on long edge". Because an imposed booklet places two portrait pages onto a landscape carrier sheet, you must change your printer duplex setting to "Flip on short edge" (Short-Edge Binding). This ensures both sides print right-side up.
2. Unexpected blank pages appear in the booklet
Because every folded sheet produces four page positions, the total page count of a saddle-stitched booklet must be a multiple of 4. If your original document has 10 pages, the imposition engine automatically adds two blank pages at the end to make 12. You can use these extra pages intentionally for an "About the Author" note, contact information, or lined notes.
3. The office stapler cannot reach the center fold
A standard desk stapler has a throat depth of only 3 to 4 inches, which cannot reach the center spine of an 8.5 x 11 inch or A4 sheet. You can use a dedicated long-reach stapler, or open your regular stapler 180 degrees flat, press the staple through the spine crease into a soft eraser or cardboard block underneath, and bend the staple legs inward by hand.
4. Text is too close to the center fold crease
If body text gets swallowed into the spine fold, the original source document had very narrow inner margins. Before creating your booklet, ensure your source document layout has an inner margin of at least 12 to 15 mm (0.5 to 0.6 inches) to allow room for the spine crease and staples.
Frequently asked questions
Is the Booklet Maker tool on AZ2PDF completely free to use?
Yes. The AZ2PDF Booklet Maker is 100 percent free with no hidden subscriptions, trial limits, watermarks, or account registration requirements. You can impose documents of any size as often as you need.
Why do booklet pages have to be in multiples of 4?
When a single physical sheet of paper is folded in half, it forms four distinct page faces: front cover, inside left, inside right, and back cover. As a result, every saddle-stitched booklet must contain a total page count divisible by four (such as 8, 12, 16, or 24 pages). If your original PDF has an odd count or is not divisible by 4, the imposition engine automatically pads the document with clean blank pages.
Should I choose flip on short edge or long edge for booklet printing?
Always choose 'Flip on short edge' (also known as short-edge binding). Because two portrait pages are imposed side-by-side onto a landscape sheet, the fold axis aligns with the sheet's short vertical center. Flipping on the long edge causes the reverse side of each sheet to print upside down.
What is the difference between booklet imposition and N-Up multi-page layout?
N-Up layout places consecutive pages sequentially on a flat sheet (page 1 and page 2 together, followed by page 3 and page 4) for presentation handouts and study notes. Booklet imposition rearranges pages into non-sequential folding signatures (such as page 16 alongside page 1) so that when sheets are folded down the spine, pages appear in consecutive reading order.
Are my uploaded manuscripts and publications stored on your servers?
No. AZ2PDF processes all document transformations in volatile server RAM buffers. Files are never stored permanently on disk drives, never cataloged, and never used for machine learning models. An automated background cleanup daemon permanently purges all processing traces within 5 minutes.
Master prepress folding and bindery workflows with the AZ2PDF prepress and booklet printing tools, which executes complex page imposition algorithms locally without server latency.
❓ Frequently asked questions
Yes. The AZ2PDF Booklet Maker is 100 percent free with no hidden subscriptions, trial limits, watermarks, or account registration requirements. You can impose documents of any size as often as you need.
Related articles in this topic
Deep dive into related document organization and page manipulation workflows.

How to print multiple PDF pages on one sheet (free N-Up tool)
Learn how to combine 2, 4, or more PDF pages onto a single sheet for easy printing and handouts. Save paper, preserve vector quality, and process files 100% free and privately.

How to convert multi-page PDF to a single continuous page (free online tool)
Convert multi-page PDF documents into one continuous vertical scrolling page. Remove artificial page breaks, preserve vector text quality, and process files 100% free in your browser.
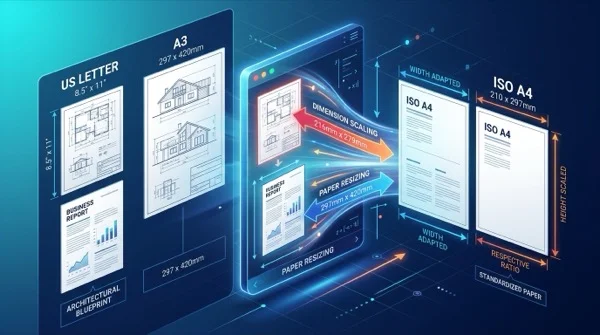
How to scale PDF pages online to standard paper sizes (free and sharp)
Learn how to scale PDF pages to standard paper sizes like A4, Letter, and A3 online for free. Fix printer margin cut-offs with 100% sharp vector typography.
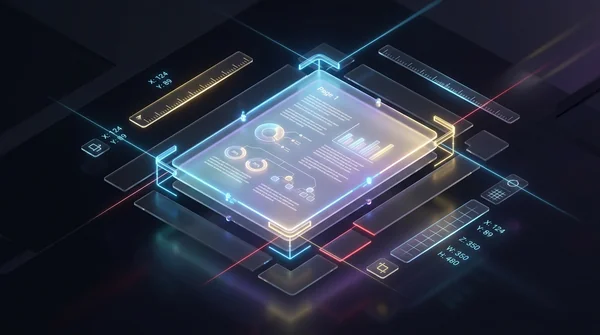
How to crop PDF margins and trim page borders online for free
Learn how to crop PDF margins and trim unwanted borders online for free. Adjust page boundaries for Kindle, shipping labels, and academic papers with zero quality loss.
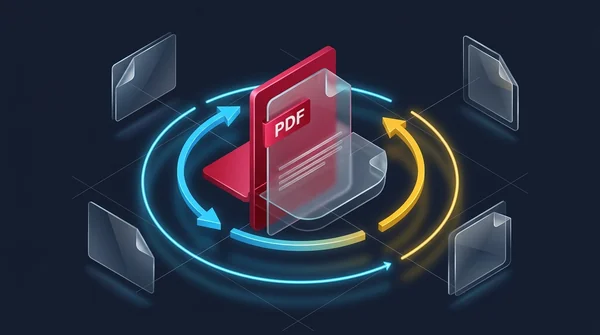
How to rotate and save PDF pages permanently online for free
Learn how to rotate sideways or upside-down PDF pages and save them permanently for free online. Fast, secure, and preserves 100% original document quality.
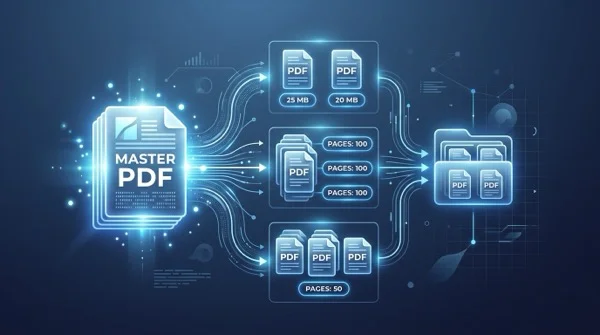
How to split a PDF by size or page count (free online)
Learn how to split large PDF files into smaller chunks by target size or page count online for free. Divide oversized documents for email and portals in seconds.